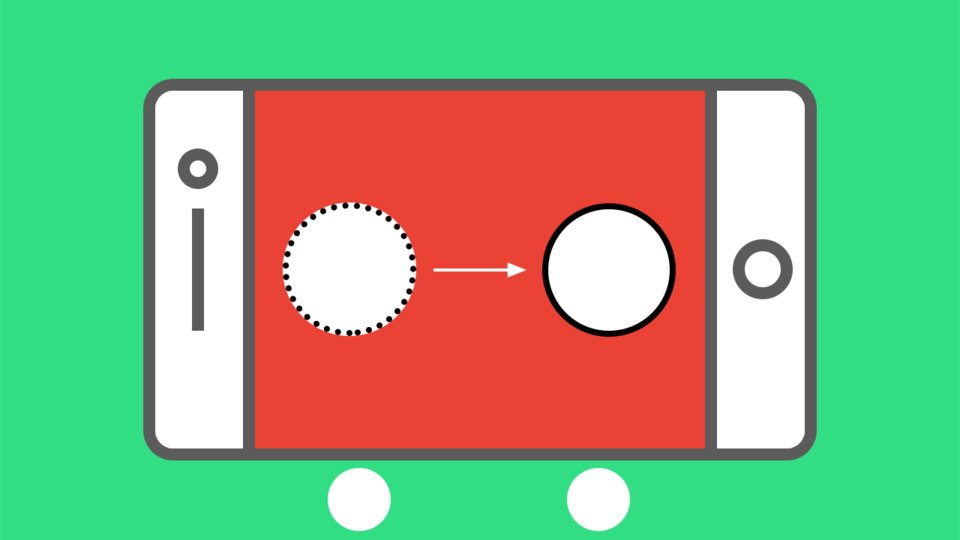
Tổng quan về ItemAnimator
ItemAnimator là thành phần hỗ trợ animation khi thêm vào hay xóa 1 item ra khỏi RecyclerView có các lớp chính sau:
ItemAnimator: là lớp đại diện, khung sườn của animation trongRecyclerView.SimpleItemAnimator: lớp wrapper lạiItemAnimator.DefaultItemAnimtor: lớp xử lý animation mặc định, sử dụng trongRecyclerView.
Viết lại lớp xử lý animation bằng cách kế thừa lại lớp SimpleItemAnimator.
Để đặt ItemAnimator cho ReyclerView, sử dụng phương thức setItemAnimator(ItemAnimator).
Tuy nhiên, phải tạo custom adapter và gọi thông báo đúng trường hợp, ứng với các thao tác thêm và xóa item.
Thông báo Adapter xử lý animation
Không giống như ListView khi có thay đổi về mặt dữ liệu thì phải gọi notifyDataSetChanged để hiển thị lại ListView, ReyclerView có 1 số điểm khác như sau:
Gọi notify tại vị trí thay đổi bằng các phương thức:
notifyItemChanged(int) |
Notify item tại vị trí position nếu có thay đổi, phương thức này cũng được sử dụng nếu muốn thực hiện animation khi item changed. |
notifyItemInserted(int) |
Notify nếu insert 1 item tại vị trí position, phương thức này cũng được sử dụng nếu muốn thực hiện animation khi add 1 item vào RecyclerView. |
notifyItemRemoved(int) |
Notify khi remove 1 item tại vị trí position, phương thức này cũng được sử dụng nếu muốn thực hiện animation khi remove 1 item ra khỏi RecyclerView. |
notifyItemRangeChanged(int, int) |
Notify những item thay đổi trên 1 miền từ fromPosition, phương thức này cũng được sử dụng nếu muốn xử lý animation những item changed. |
notifyItemRangeInserted(int, int) |
Notify các item được insert vào từ fromPosition, phương thức này cũng được sử dụng nếu muốn xử lý animation những item được insert. |
notifyItemRangeRemoved(int, int) |
Notify các item remove ra khỏi RecyclerView từ fromPosition, phương thức này cũng được sử dụng nếu muốn xử lý animation những item được removed. |
Ngoài ra RecyclerView cũng có phương thức notifyDataSetChanged() giống như ListView, tuy nhiên phương thức này sẽ không xảy ra animation.
Ví dụ khi thêm 1 item vào Adapter:
public void addItem(String item) {
    mDatas.add(item);
    // Notify tại vị trí add item.
    notifyItemInserted(mDatas.size() - 1);
}
Hoặc:
public void addItem(int position, String item) {
    mDatas.add(position, item);
    notifyItemInserted(position);
}
Xóa 1 item:
public void removeItem(int position) {
   mDatas.remove(position);
   notifyItemRemoved(position);
}
Hoặc:
public void removeItem(String item) {
    int index = mDatas.indexOf(item);
    if (index < 0)
        return;
    mDatas.remove(index);
    notifyItemRemoved(index);
}
Đổi 1 item:
public void replaceItem(int postion, String item) {
    mDatas.remove(postion);
    mDatas.add(postion, item);
    notifyItemChanged(postion);
}
Việc sử dụng ItemAnimator:
- Đặt
ItemAnimatorchoRecyclerViewthông qua phương thứcsetItemAnimator() - Viết custom adapter sử dụng những phương thức thông báo đã giới thiệu ở trên.
Ứng dụng demo
Tổng quan về ứng dụng như sau:
- 1 button dùng để thực hiện thêm item vào adapter và có animation.
- Khi nhấp chuột vào item thì thực hiện thay đổi animation trên item đó.
- Khi nhấp giữ item thì thực hiện xóa animation trên item đó.
File main_acitivity.xml
<?xml version="1.0" encoding="utf-8"?>
<RelativeLayout xmlns:android="http://schemas.android.com/apk/res/android"
    xmlns:tools="http://schemas.android.com/tools"
    android:layout_width="match_parent"
    android:layout_height="match_parent"
    tools:context="com.eitguide.nguyennghia.animationreyclerview.MainActivity">
    <Button
        android:id="@+id/btn_add_item"
        android:layout_width="match_parent"
        android:layout_height="wrap_content"
        android:text="Add Item" />
    <android.support.v7.widget.RecyclerView
        android:id="@+id/rv_items"
        android:layout_width="match_parent"
        android:layout_height="match_parent"
        android:layout_below="@id/btn_add_item" />
</RelativeLayout>
File MainActivity.java
package com.eitguide.nguyennghia.animationreyclerview;
import android.support.v7.app.AppCompatActivity;
import android.os.Bundle;
import android.support.v7.widget.DefaultItemAnimator;
import android.support.v7.widget.LinearLayoutManager;
import android.support.v7.widget.RecyclerView;
import android.view.View;
import android.widget.Button;
import java.util.ArrayList;
import java.util.List;

public class MainActivity extends AppCompatActivity {
    private Button btnAddItem;
    private RecyclerView rvItems;

    @Override
    protected void onCreate(Bundle savedInstanceState) {
        super.onCreate(savedInstanceState);
        setContentView(R.layout.activity_main);
        btnAddItem = (Button) findViewById(R.id.btn_add_item);
        rvItems = (RecyclerView) findViewById(R.id.rv_items);
        List<String> data = new ArrayList<>();
        for (int i = 0; i < 5; i++) {
            data.add("item " + i);
        }
        final CustomAdapter adapter = new CustomAdapter(data);
        rvItems.setAdapter(adapter);
        rvItems.setLayoutManager(new LinearLayoutManager(this));
        //set ItemAnimator for RecyclerView
        rvItems.setItemAnimator(new DefaultItemAnimator());
        btnAddItem.setOnClickListener(new View.OnClickListener() {
            @Override
            public void onClick(View view) {
                adapter.addItem("new item");
                rvItems.scrollToPosition(adapter.getItemCount() - 1);
            }
        });
    }
}
- Button
btnAddItemsẽ thêm 1 item có nội dung là "new item" vào Adapter. - Phương thức
scrollToPosition()sẽ di chuyển đến vị trí vừa thêm item. - Cần phải đặt
ItemAnimatorchoRecyclerView.
Lớp CustomAdapter.java
package com.eitguide.nguyennghia.animationreyclerview;
import android.support.v7.widget.RecyclerView;
import android.text.Layout;
import android.view.LayoutInflater;
import android.view.View;
import android.view.ViewGroup;
import android.widget.TextView;
import android.widget.Toast;
import java.util.List;
/**
 * Created by nguyennghia on 8/27/16.
 */
public class CustomAdapter extends RecyclerView.Adapter<CustomAdapter.ViewHolder> {
    private List<String> mDatas;

    public CustomAdapter(List<String> data) {
        mDatas = data;
    }

    @Override
    public ViewHolder onCreateViewHolder(ViewGroup parent, int viewType) {
        LayoutInflater li = LayoutInflater.from(parent.getContext());
        View itemView = li.inflate(R.layout.item_row, parent, false);
        return new ViewHolder(itemView);
    }

    @Override
    public void onBindViewHolder(ViewHolder holder, int position) {
        String item = mDatas.get(position);
        holder.tvItem.setText(item);
    }

    @Override
    public int getItemCount() {
        return mDatas.size();
    }

    public void addItem(String item) {
        mDatas.add(item);
        notifyItemInserted(mDatas.size() - 1);
    }

    public void addItem(int position, String item) {
        mDatas.add(position, item);
        notifyItemInserted(position);
    }

    public void removeItem(int position) {
        mDatas.remove(position);
        notifyItemRemoved(position);
    }

    public void removeItem(String item) {
        int index = mDatas.indexOf(item);
        if (index < 0)
            return;
        mDatas.remove(index);
        notifyItemRemoved(index);
    }

    public void replaceItem(int postion, String item) {
        mDatas.remove(postion);
        mDatas.add(postion, item);
        notifyItemChanged(postion);
    }

    public class ViewHolder extends RecyclerView.ViewHolder {
        private TextView tvItem;
        public ViewHolder(final View itemView) {
            super(itemView);
            tvItem = (TextView) itemView.findViewById(R.id.tv_item);

            itemView.setOnLongClickListener(new View.OnLongClickListener() {
                @Override
                public boolean onLongClick(View view) {
                    removeItem(getAdapterPosition());
                    Toast.makeText(itemView.getContext(), "Removed Animation", Toast.LENGTH_SHORT).show();
                    return false;
                }
            });

            itemView.setOnClickListener(new View.OnClickListener() {
                @Override
                public void onClick(View view) {
                    replaceItem(getAdapterPosition(), "item changed");
                    Toast.makeText(itemView.getContext(), "Changed Animation", Toast.LENGTH_SHORT).show();
                }
            });
        }
    }
}
Với dòng của 1 item (item_row.xml) có nội dung:
<?xml version="1.0" encoding="utf-8"?>
<FrameLayout xmlns:android="http://schemas.android.com/apk/res/android"
    android:layout_width="match_parent"
    android:layout_height="wrap_content"
    android:layout_marginTop="3dp"
    android:background="#ecf0f1">
    <TextView
        android:id="@+id/tv_item"
        android:layout_width="match_parent"
        android:layout_height="wrap_content"
        android:padding="8dp"
        android:textColor="#2c3e50"
        android:textSize="16dp" />
</FrameLayout>
Vì sử dụng DefaultAnimator nên animation sẽ như sau:
- Animation Added: thực hiện thay đổi giá trị alpha của
itemViewtừ 0 đến 1. - Animation Removed: thực hiện thay đổi giá trị alpha của
itemViewtừ 1 về 0. - Animation Changed: thực hiện animation từ 1 về 0, sau đó đặt animation từ 0 đến 1 để thay đổi item.
Đó là cách mà DefaulItemAnimator xử lý, nếu muốn animation theo mong muốn thì phải viết lại animation bằng cách kế thừa từ SimpleItemAnimator.
Tải source code của thư viện và demo:
- Tải trực tiếp:
- Thư viện: recyclerview-animators-master.zip.
- Demo: AnimationRecyclerView-master.zip.
- Tải từ Github:
